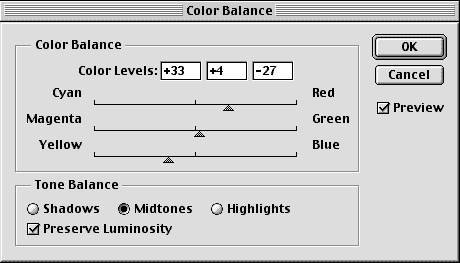
Color Balance
The next step is to adjust the colors to look more natural. As always, there are many ways to do this, today we will use the Color Balance sliders

- Make a new Color Balance adjustment layer in the layers palette (icon shown above).
- The Color Balance box allows you to alter the colors in three different areas of the picture, the shadows, midtones, and highlights. The rest of the box is fairly straightforward. I usually start in the midtones and find the most obvious problem, that there was way too much blue. I took the blue slider and slowly shifted it to yellow until I could see a faint yellow tint coming on over the picture, I'll then back it a titch towards blue just so there isn't too much yellow.
- Adjust the rest of the sliders in the main areas of shadows, midtones, and highlights in the same manner.
A few points
- While adjusting the different colors, I usually look at the areas of the image where the biggest color shifts occur. The green/magenta slider makes the biggest difference in skin color and watching this area helps to make a more accurate adjustment.
- I added a little extra yellow because I felt it gave the picture a little more warmth.
- You can access the color balance box if you aren't using an adjustment layer through Image>Adjust>Color Balance
|
 
Nicholas doesn't look like he is freezing anymore.

|
