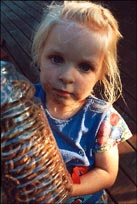
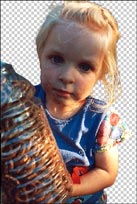
Masks are represented as grayscale images and located to the right of the image thumbnail in the layers palette (if a mask is present, otherwise the space will be empty). If you option-double click on the mask thumbnail a grayscale the mask will appear in the image window in all of its glory, which isn't very glorious because it is a grayscale image. The white areas of the mask represents areas of the image that show through, the black areas are masked and represent parts of the image that don't show through. The areas of the layer that are masked (the black areas) become transparent and are represented in the image window by the checkerboard pattern as seen below. The power of the mask becomes obvious when you consider that the gray areas on the mask are semi-transparent, this gives you the power to get that selection to perfectly fade away along the transition of pixels at the edge of an object.


It's important to keep in mind that you can do practically anything to change a mask that you would do to change a grayscale image. You can airbrush, paint, blur, adjust levels, sharpen, distort, etc. The mask is nothing more than a black and white image that governs which part of the layer is transparent and which is not.
A new Layer Mask is created by clicking on the Add a Mask icon at the bottom of the layer palette (with multiple layer images, the mask will be created on the active layer).

When you click on the icon a white thumbnail appears by the side of the image thumbnail of the active layer. If you want to enter mask mode click on the mask thumbnail (a black border appears around it to show it is active). Now whatever you do will be applied to the mask, not the image itself. If you paint black over areas of the image you will note that these areas do not become black, but become transparent. Go ahead and try other things like using the paint bucket, gradients, filters, levels, etc. If you want to go back and paint on the image (instead of the mask) you can get out of mask mode by clicking the image thumbnail.
